Don't you wish you could make cool campaign signs like me?
 Todd Epp has a comment under one of the previous posts that he really enjoys my "How to" postings. And I'm really tempted to divulge one of my favorite secrets - How I make my 4x8's signs.
Basically the only way they'd come out better would be if they were screen printed. And since I know how to do that as well, I know how elusive and difficult that process can be. Do you know how much emulsion it would take to do a 4x8 screen? Not to mention the difficulty in simply exposing and washing out the screen?
I do my own t-shirts and you can screw up a screen without even trying. Now multiply that times 10. 1 quart of emulsion down the drain at a time - at about $20 a crack. That's why I do my signs this way.
I started creating this process long ago when I was helping a young upstart State Senate candidate who had never run before, and he was taking on a Democratic House member who wanted to move up to the Senate. Little Brock Greenfield wanted to do some road signs, and I happened to have access to an opaque overhead.
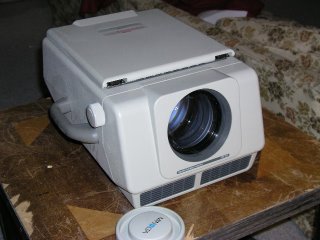
An opaque overhead is just like your normal overhead, except you don't need a transparency. It will project your image up on the screen straight off of a sheet of paper.
When I did Brock's first template, I had a screened-in porch, it was raining, and I was bored. So I stood out there after finding a 4x8 piece of cardboard and traced the image projected on to the cardboard. As soon as it was done, I called, and Brock took off from Doland at about 7pm, getting to Pierre around 10pm to pick it up. And he loaded it up, and turned right around for home.
I've come a long way since then. A cardboard template is ok, but it doesn't last for too many signs.
State Auditor Rich Sattgast deserves the credit for finding the perfect material to do this with. He went through cardboard, masonite, and a couple of others before he hit upon the perfect material - glassboard.
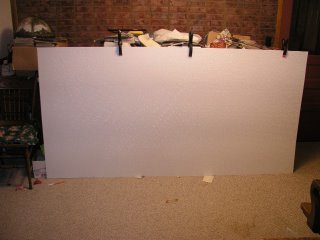 What the heck is glassboard? I would describe it as a thin layered fiberglass board which as an exterior coat of plastic. Or it's a plastic panel impregnated with fiberglass. The key to it is that't it's not exactly plastic or fiberglass.
When you cut it, the material doesn't splinter or melt. It turns to powder. I've tried other stuff, such as plastic shower linings, and it will not work like this stuff. That removed material turning to powder allows you to cut quickly and with a minimum of mistakes.
So anyway, you get the glassboard and an opaque projector. Stand the glassboard up as straight as possible! If it's warped when you stencil it, it will look warped when you use the stencil. You will want to draw your stencil on the bumpy side - the side that would be on the outside when you install this stuff in a kitchen or bathroom.
Why draw on the bumpy side instead of the flat one? Because you want the tightest contact possible when you paint, so you need the flat side down. Set up your glassboard and your projector:
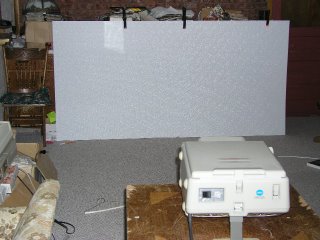
And project the image on the glassboard that you'd like to stencil:
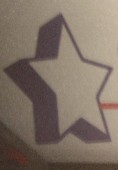 Once up on the screen, use a sharpie marker and trace the image on the glassboard. Once you start tracing - do not stop or bump the projector.
 And you see we have our star. If I cut this out like this, we'd have a big star instead of an outline of one as I want. So you have to draw some cut lines to support the inside cut out. Because this is a stencil. To make it simpler, I'll show you the same concept on a letter:
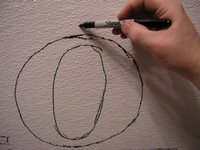
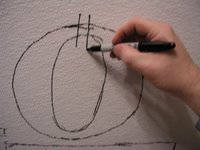
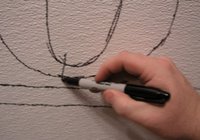 What I did was draw some lines to guide my cutting so I don't cut the whole interior out, leaving a convincing looking "O" - at least it will be convincing from several dozen yards away.
So, now that I've drawn my cut lines into the star, I'm ready to cut.
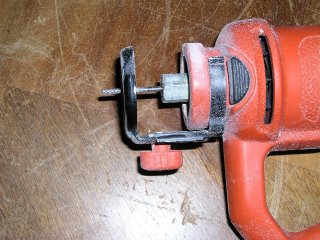 I prefer to use a rotozip type tool for this process because of it's dexterity. Another compatriot prefers a router for the control. It's really up to the operator. If you use a rotozip, DO NOT USE THE NORMAL CUTTING BLADES. You'll break them left and right.
You need the carbide cutting tool as I've got installed above. It doesn't look like much of anything, but it cuts through this stuff like crazy - and you can use it for many signs. I have yet to replace mine. Normal blades - you'll use three or four on one sign.
When cutting, plunge the blade into waste material and then work towards the inside edge. Don't cut the line, cut to the inside of it. Your detail will be finer.
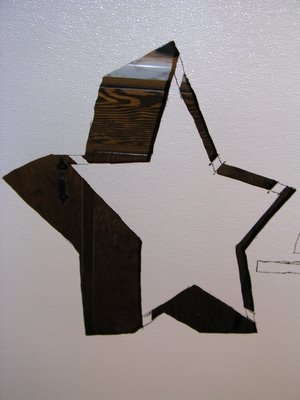
 You can see I've removed the portion of the star that I intend to paint. And you can see my cut lines which will support the interior of the star. Notice there's a couple slightly rough edges? Who cares. It's going to be viewed from a distance and as you paint it will blend in any imperfections.
 We repeat the process, and the star is cut out.
I like this way to make a sign template, as you can duplicate fonts that you might have in a logo, or special characters such as the star above. Just like screenprinting, except less mess, and it's much more forgiving of mistakes. Used properly, this template will last for literally hundreds of signs.
What should you use to paint signs with? Well, I don't want to give all of my secrets away.
Comments
More seriously, what is a brand name of the sheet stuff and where can it be found..Menards?
I just bought a metal bender. That has got to be good for something. Keep putting this stuff together and you will have the material for one of those dandy how-to books. A real oddity too ..written by a Republican who can think and do things with his hands too...even if not necessarily at the same time.
I can't go to far with these compliments. I risk destroying my dreadful nasty reputation.
And necessity is still the mother of invention.
SD Blogwatchman is back? It isn't ground hogs day is it?